Bitbucket Pipeline
To use DCM with Bitbucket CI/CD, create a bitbucket-pipelines.yaml file in the root of your application (or use Bitbucket pipeline in the dashboard) and add a step that runs DCM commands.
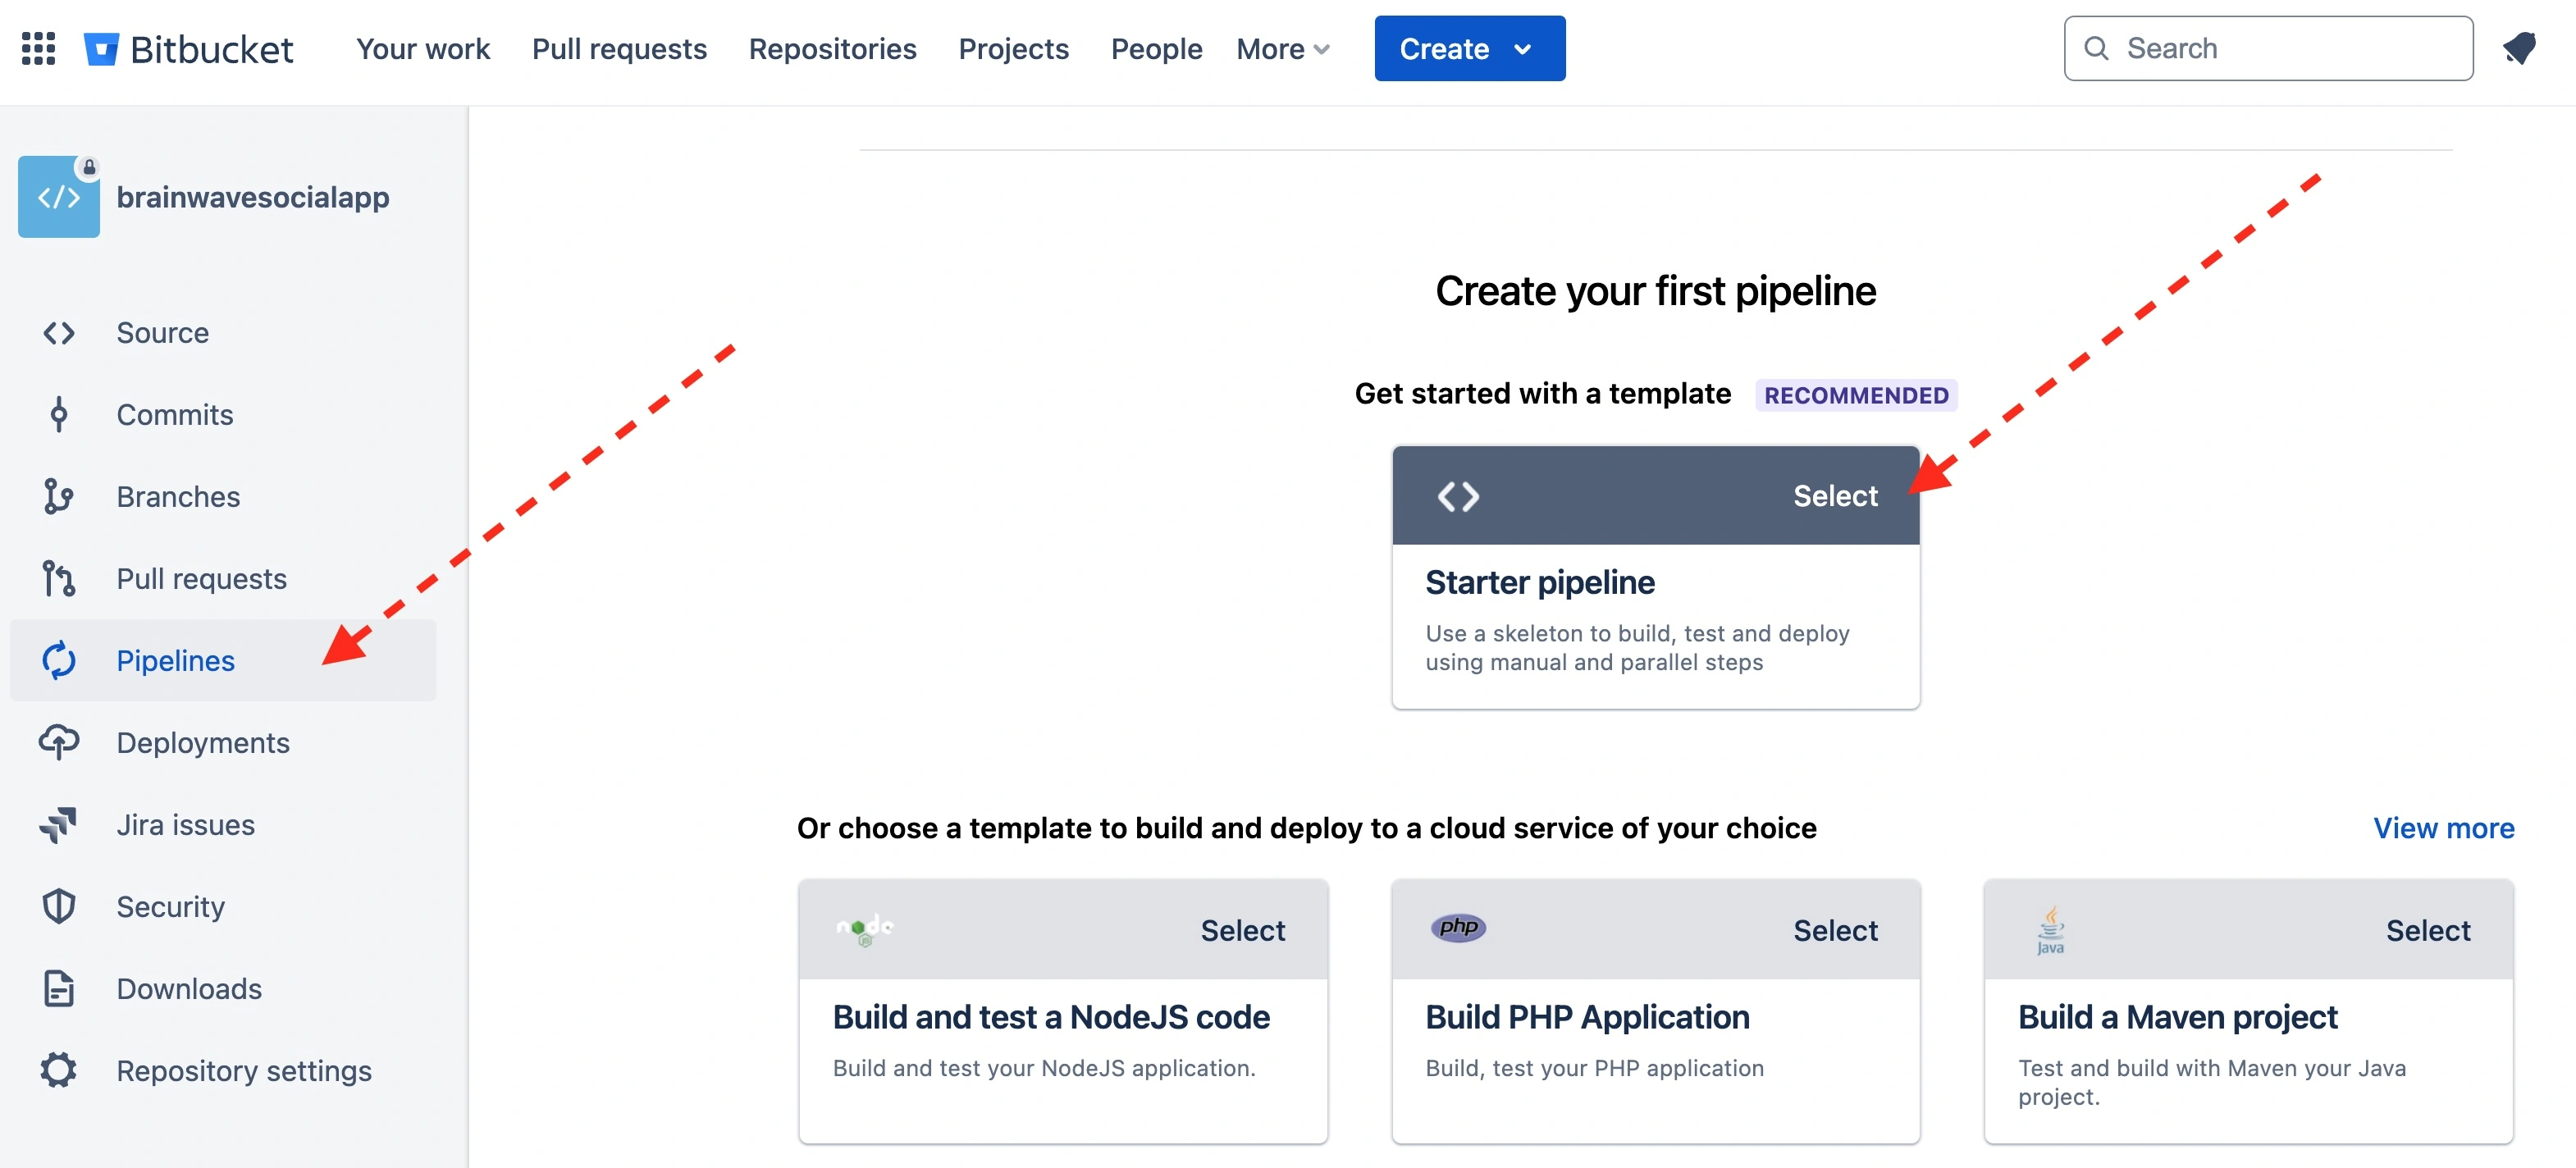
Here’s how you can set up a pipeline configuration for Bitbucket:
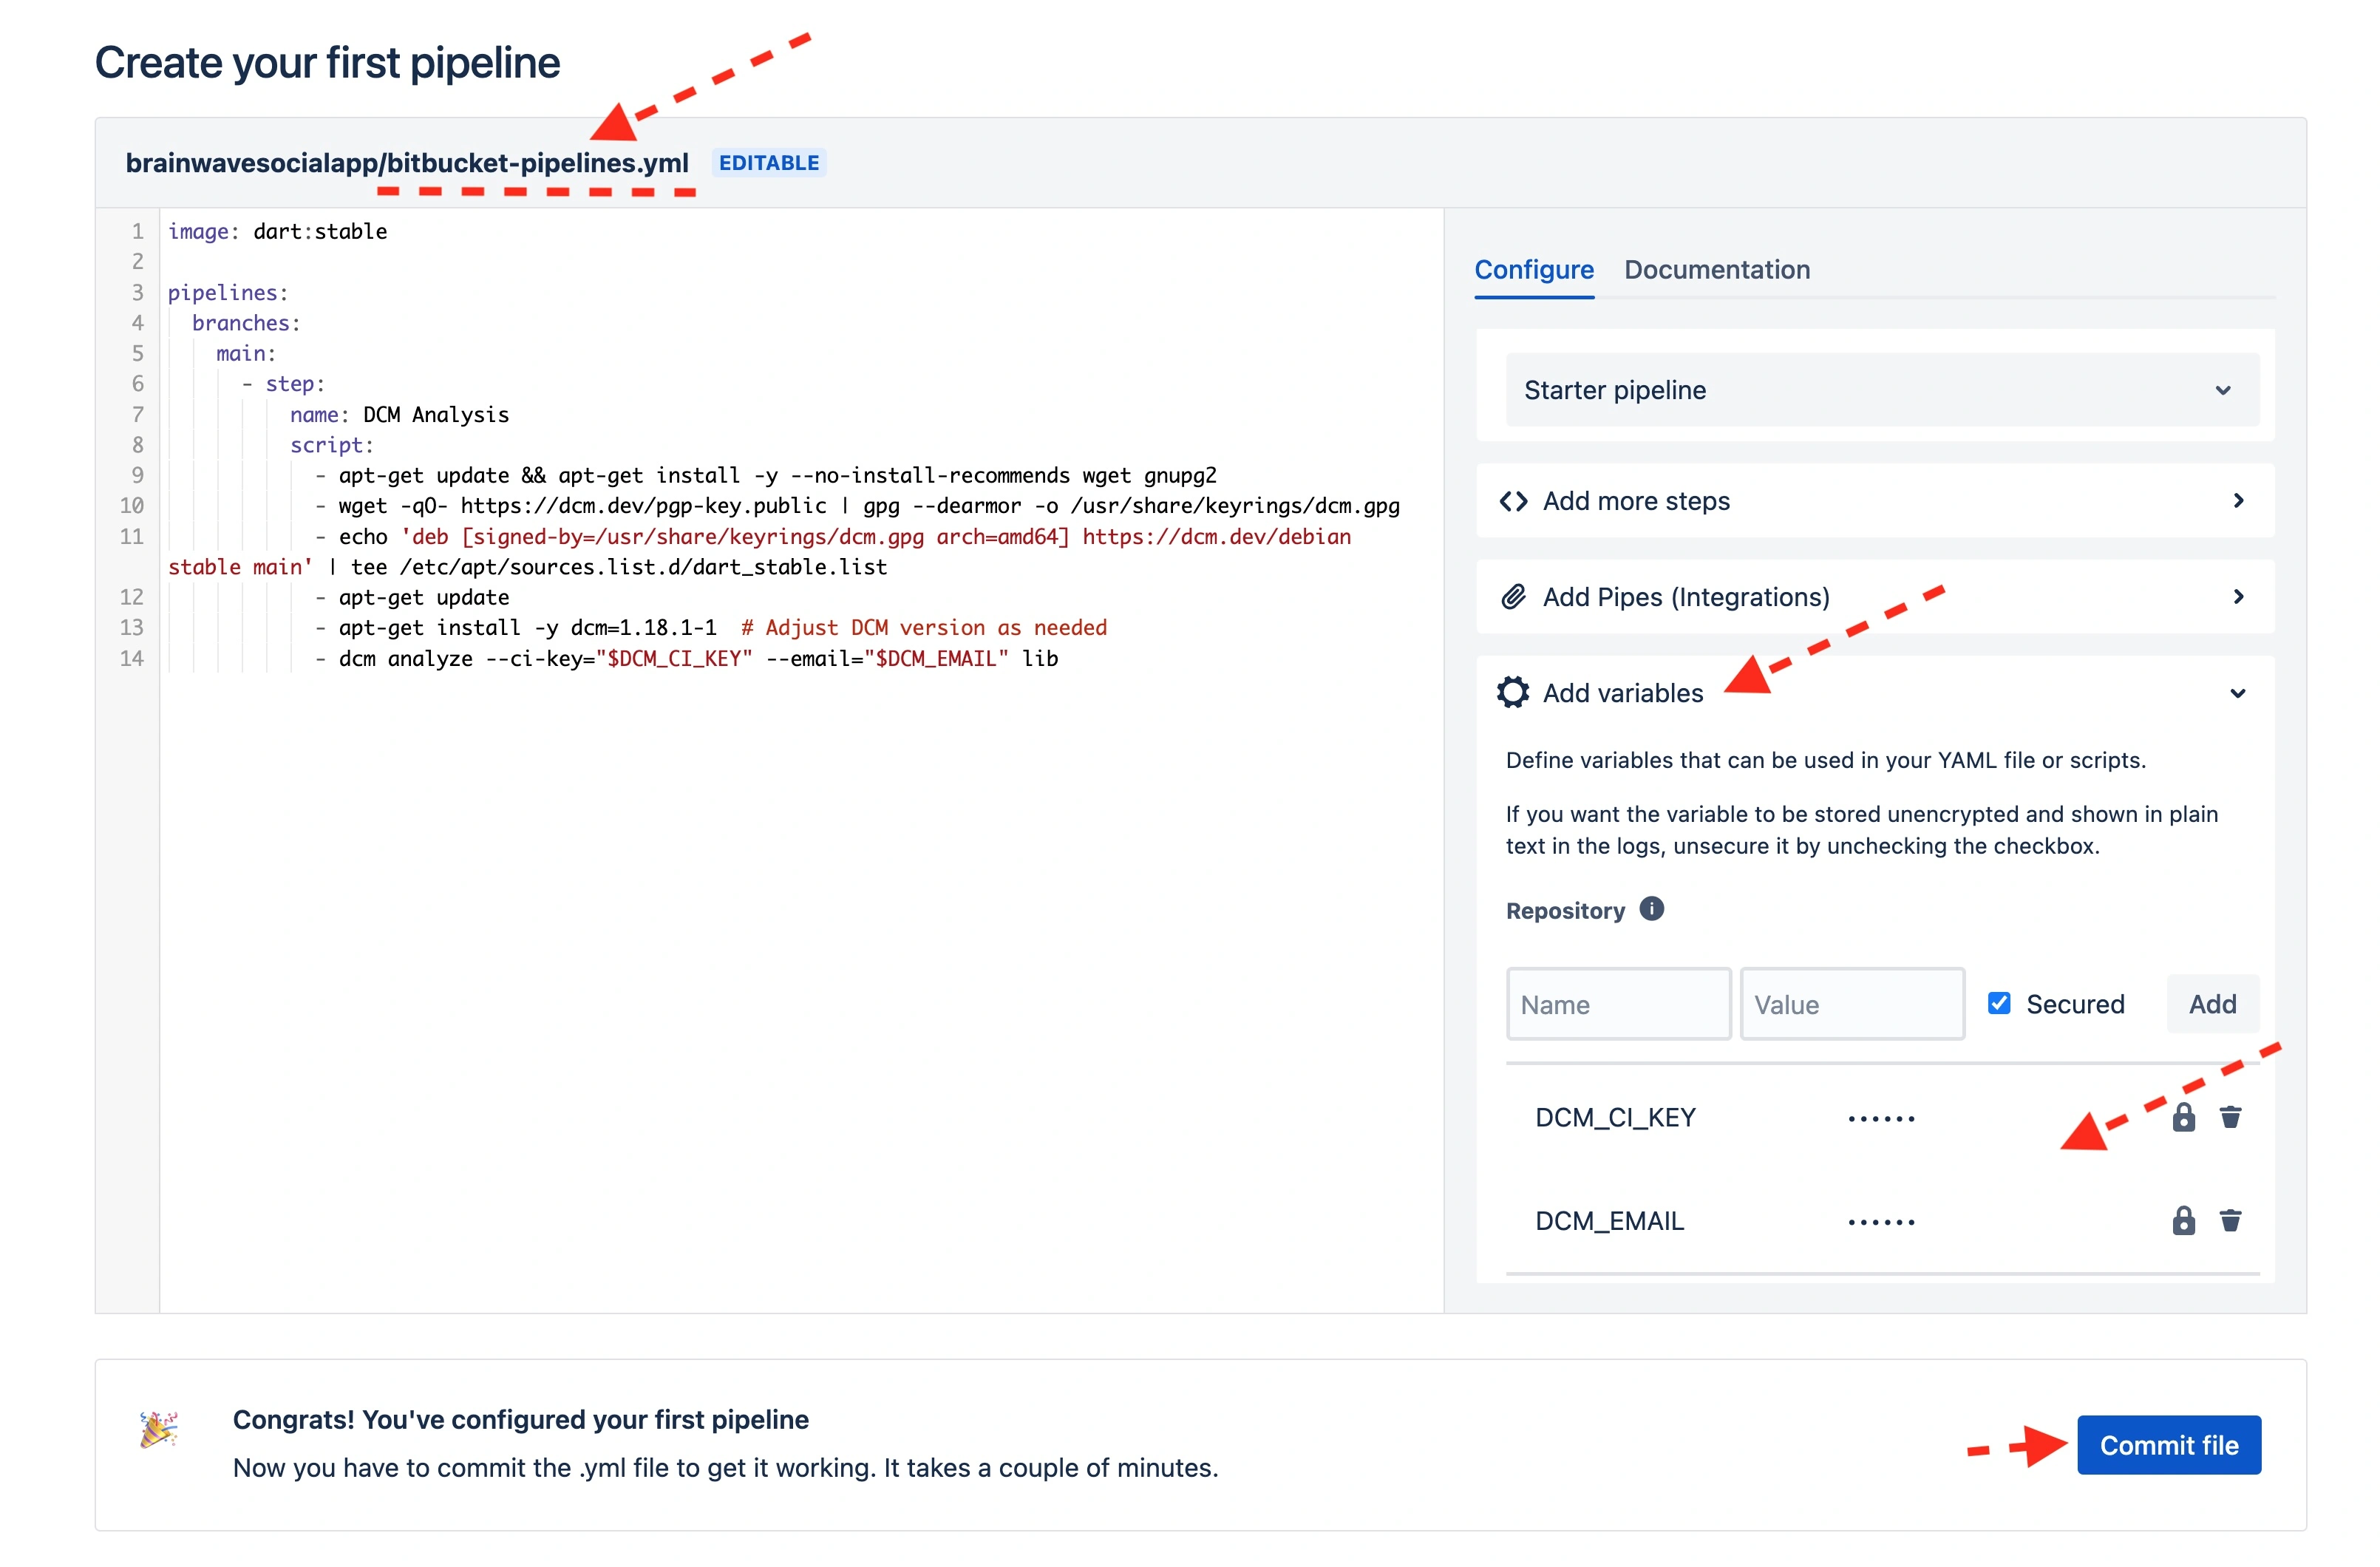
image: dart:stable

pipelines:
  branches:
    main:
      - step:
          name: Code Quality
          script:
            - apt-get update && apt-get install -y --no-install-recommends wget gnupg2
            - wget -qO- https://dcm.dev/pgp-key.public | gpg --dearmor -o /usr/share/keyrings/dcm.gpg
            - echo 'deb [signed-by=/usr/share/keyrings/dcm.gpg arch=amd64] https://dcm.dev/debian stable main' | tee /etc/apt/sources.list.d/dart_stable.list
            - apt-get update
            - apt-get install -y dcm=1.27.1-1 # Adjust DCM version as needed
            - dcm run --analyze --unused-code --reporter=checkstyle lib > checkstyle-result.xml # DCM_CI_KEY and DCM_EMAIL retrieved from ENV automatically
          after-script:
            - pipe: atlassian/checkstyle-report:0.4.0
-
Image: Specifies the Docker image to use for running the pipeline. Here,
dart:stableis used. -
Pipelines: Defines the pipeline configuration. In Bitbucket Pipelines, you organize jobs under specific triggers (
branchesin this case). -
Branch Configuration: Under
branches, you specify which branch triggers this pipeline configuration (mainbranch in this example). -
Steps:
- Each
steprepresents a job within the pipeline. - Step Name: Describes the job purpose (
DCM Analysis). - Script:
- Installs necessary packages (
wget,gnupg2) required for setting up DCM. - Downloads DCM's GPG key and adds the repository configuration.
- Updates package lists and installs DCM using
apt-get install. - Runs
dcm analyzeordcm runwith the providedDCM_CI_KEYandDCM_EMAILparameters to perform static code analysis on thelibdirectory. Note that you don't need to passDCM_CI_KEYandDCM_EMAILif they are available in ENV variables. DCM can automatically detect and retrieve them from Env variables. - Pipe and create xml file for
atlassian/checkstyle-reportto analyze and report in PR.
- Installs necessary packages (
- Each
To learn more about bitbucket-pipelines.yaml format, refer to Bitbucket documentation.
The docs for the Checkstyle integration can be found here.
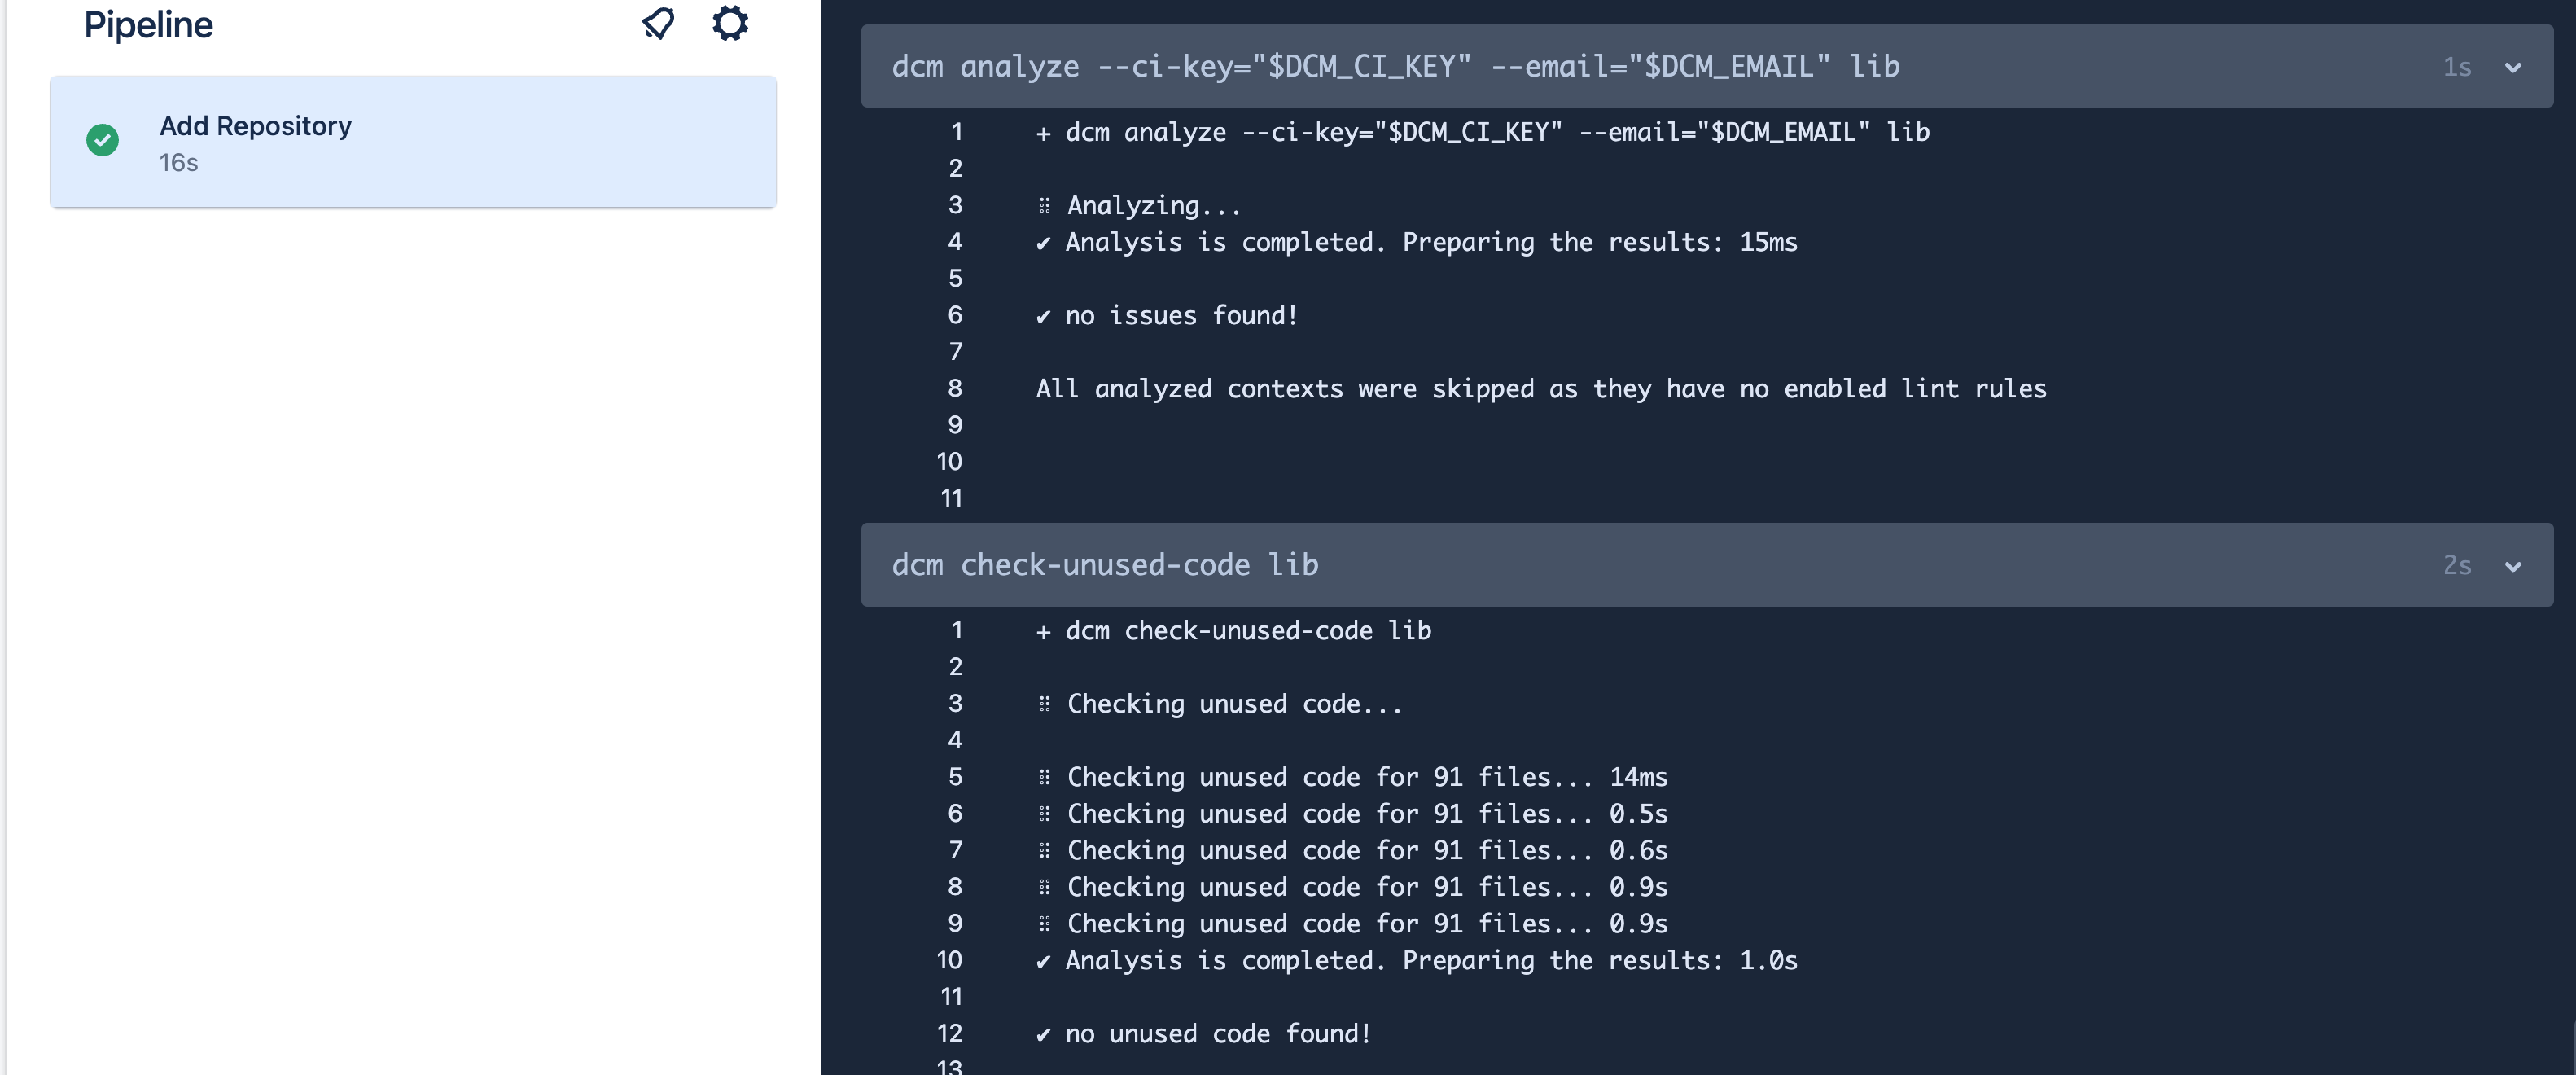
Here is the pipeline result in BitBucket console:
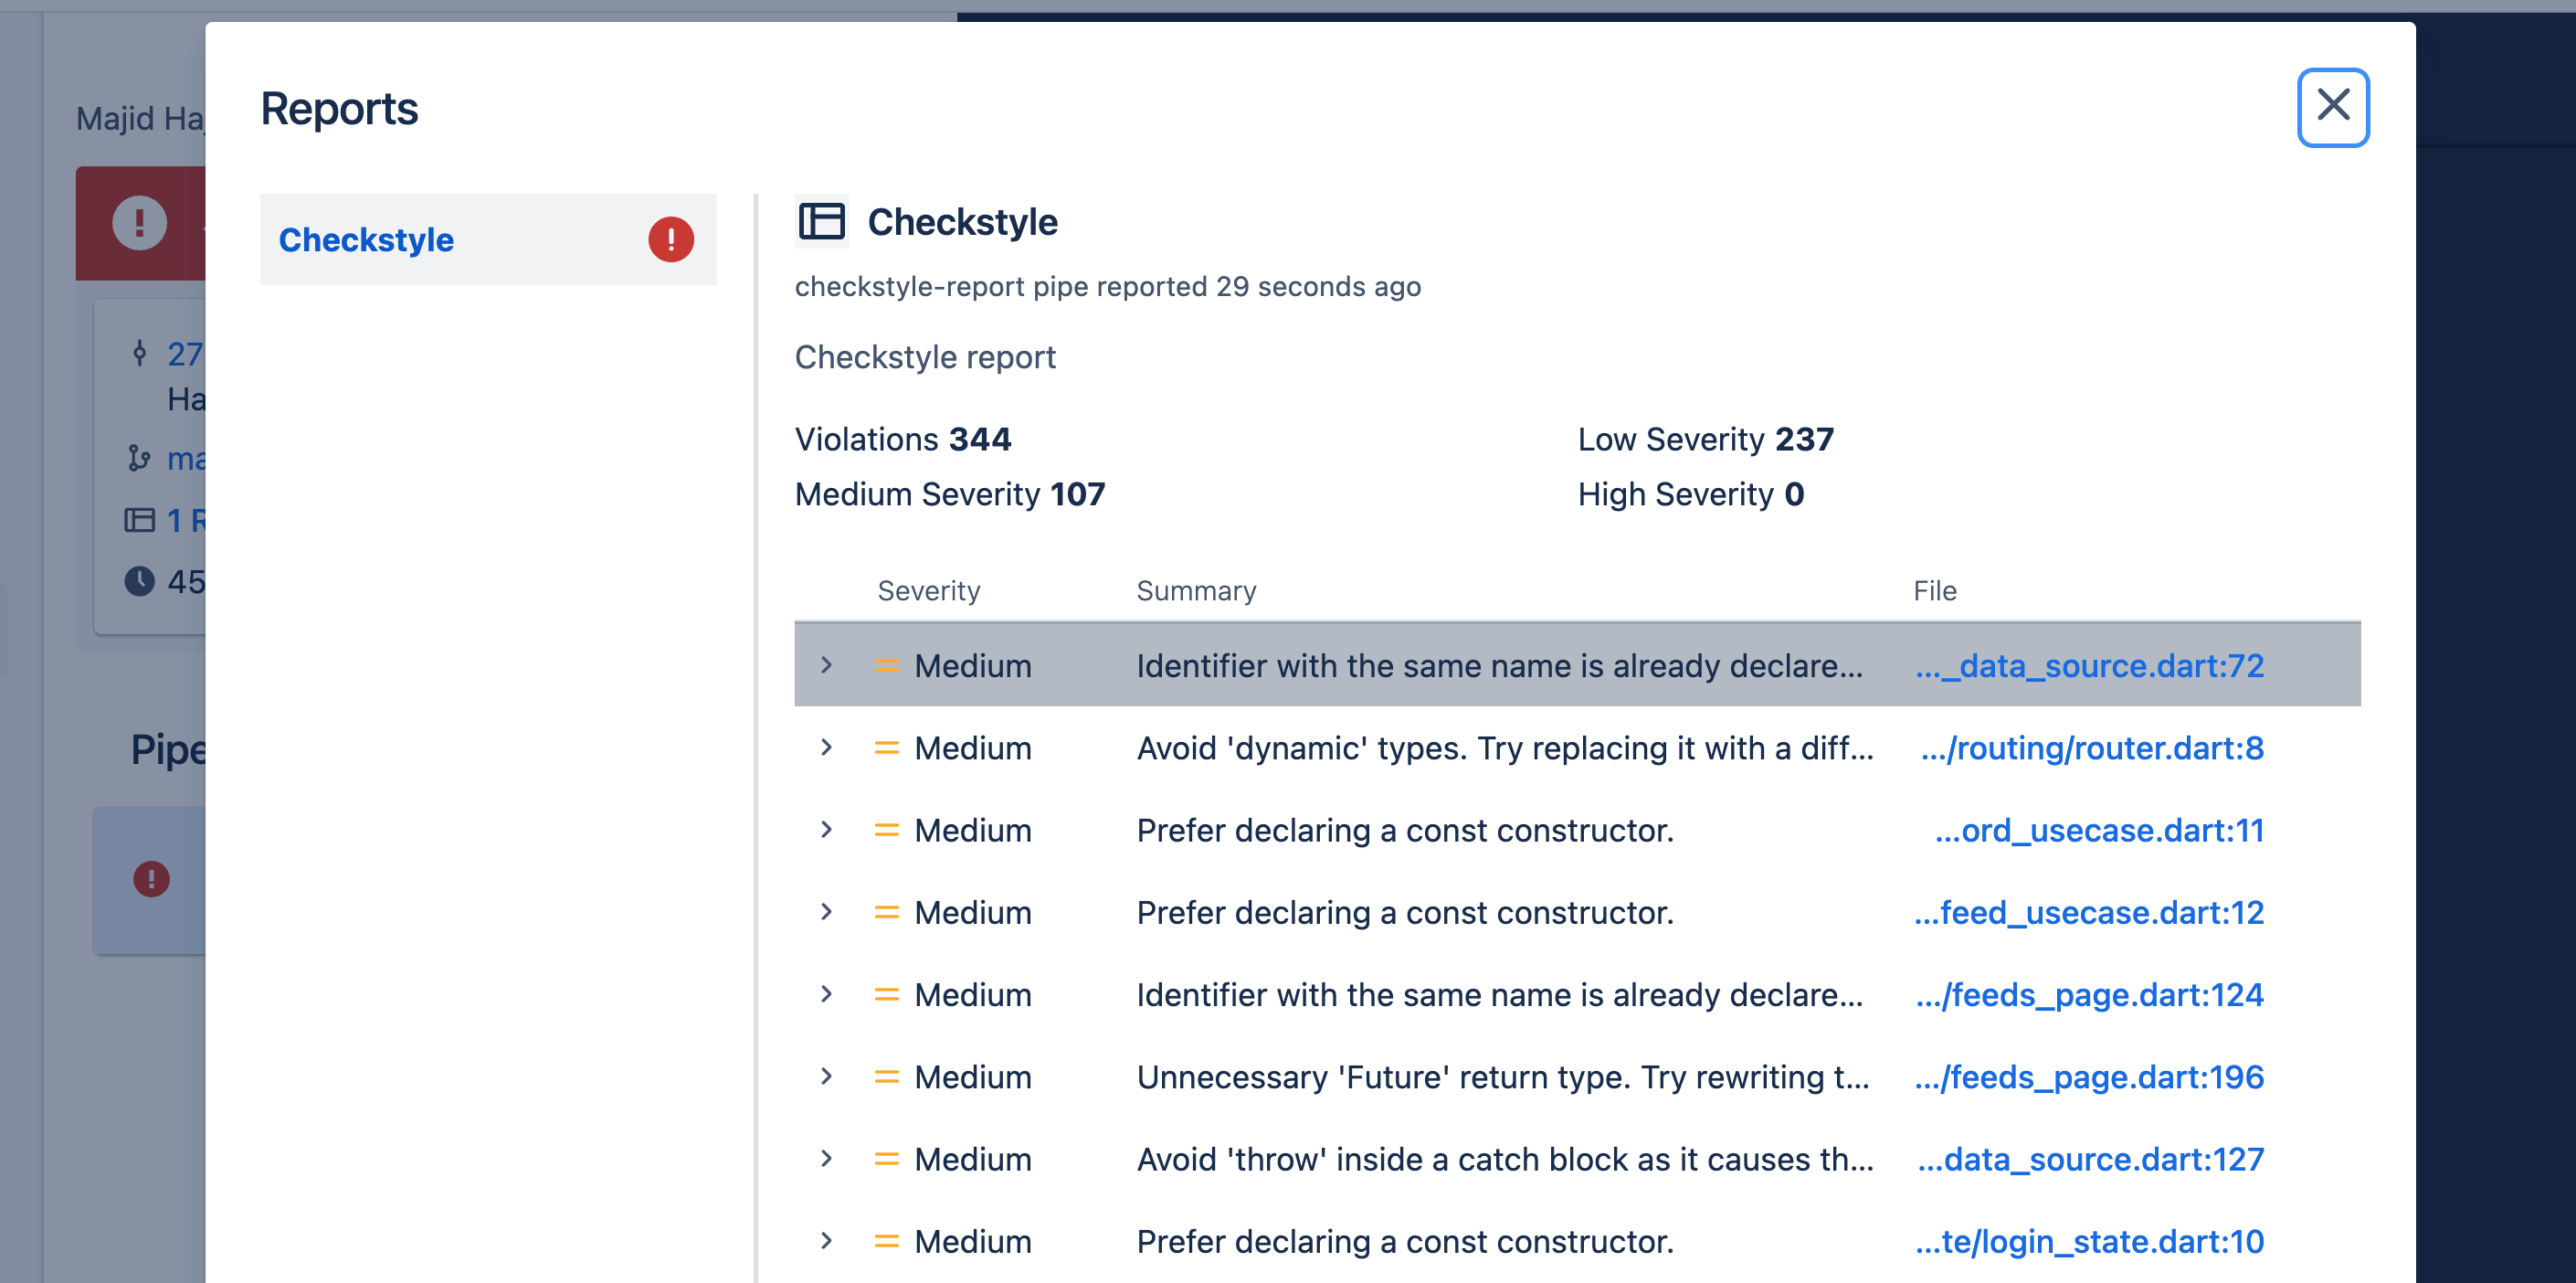
Here is the pipeline result in BitBucket PR:
-
Environment Variables: Replace
$DCM_CI_KEYand$DCM_EMAILwith actual values or Bitbucket environment variables. -
Security: Handle sensitive information securely using Bitbucket’s environment variables or secret management features.
-
Customization: Adjust the DCM version (
1.27.1-1in this example) according to your project's requirements.
Setting Environment Variables in Bitbucket
Bitbucket allows you to set environment variables directly in the repository settings or through the pipeline configuration UI:
-
Repository Settings: Navigate to your Bitbucket repository, go to
Settings>Pipelines>Environment variables. Here, you can add and manage environment variables securely. -
Pipeline Configuration: You can also define environment variables directly within the pipeline configuration YAML file using the
variablessection or referencing them inline.
Integrating with DCM Dashboards
To get an overview of all open issues and enabled code health metrics, and how they change over time, you can upload the results of the dcm run command to DCM Dashboards.
To get started, check out this guide.